You’re not scared of a little challenge, are you? Think of how happy you will be with a custom insert that fits inside your drawer perfectly, to organize all your silverware in neat rows and to keep it from tarnishing or getting scratched. And this project only will take…oh, nine hours or so. Just kidding. I put in the research to streamline it for you:
Spoiler alert. When you reach the end of this story, you will realize I actually completed about 90 percent of the work. To finish the project, I need your help. Please leave advice in the comment section below.
You’re tempted. But maybe you wonder if you can ignore the lure of this complicated DIY project and just get on with your life instead? The answer is no; see Stop Me Before I DIY Again for an explanation of the powerful cultural forces behind your sudden irresistible urge to make a silverware drawer insert. Or just grab an Exacto knife and get started.
Photographs by Michelle Slatalla.
Above: Every drawer is a different size, and every silverware pattern is unique. So you are going to be making a custom drawer insert that works for you. The first step is to measure your drawer—length, width, and height—and to write down the measurements. Then lay out your silverware in the bottom of the drawer. Arrange one piece of each type of silverware—knife, fork, spoon, salad fork, etc.—so you can see how many drawer dividers or knife holders you need.
Next, gather your Materials:
- 2 yards of tarnish-resistant Treated Silvercloth (available in six colors, for $22.95 per yard from Nancy Silver).
- Measuring tape.
- Fabric scissors, such as Gingher Scissors ($34.50 from Sailrite).
- X-Acto No. 2 Knife ($6.96 from Amazon).
- A 2-pack of 3/16-inch-thick Foam Board ($6.13 from Amazon).
- A cutting board.
- A pencil and scrap paper to keep track of measurements.
- White glue.
- Brushes, such as Martha Stewart 4-Piece Brush Set ($18.50 from Scrapbooking).
- A Mini Lo Temp Glue Gun ($4.49) and All Temp Mini Glue Sticks ($8.99); both available from Joann.
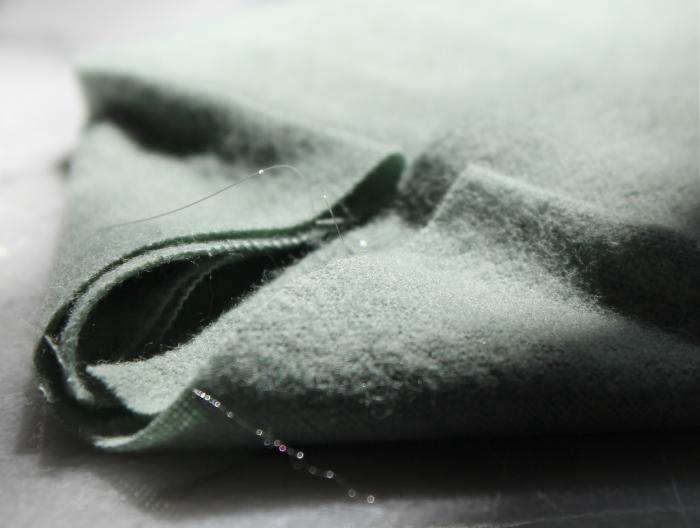
Above: The reason to use treated silvercloth rather than regular old felt, according to the people at Nancy Silver, is that it “is made of 100 percent cotton flannel using dyes that contain no acid, sulfur, or salts. Silver Cloth is impregnated with materials that absorb tarnishing gasses before they can react with the surface of your silver or jewelry.”
Do not wash silver cloth or get it wet, or it will lose its effectiveness.
Above: After measuring your drawer, you will use an Exacto knife to cut five pieces of foam board to form a base and four side pieces.
To determine the lengths for the five foam pieces, refer to your drawer measurements. Subtract 6/8 inch from the length and width for the base piece. Subtract 6/8 inch from the length of two side pieces and 3/8 inch from the length of the other two side pieces.
All four of the side pieces should be 3/8 inch shorter than the height of your drawer.
Arrange the five pieces inside the drawer to make sure they fit loosely (they will be tight after you wrap them with cloth). The four side pieces should fit against the base, rather than sit on top of the base. This is important, as the edge of the base will help hold the side pieces firmly against the drawer. Fiddle around with the pieces until they fit well, trimming as necessary.

Above: Wrap the foam pieces individually as if you were wrapping five flat gifts. Cut fabric as if it were gift wrap, and fold it tightly around the foam pieces. Seal with hot glue gun (note the tiny strands of hot glue visible above—you can wipe them off after they cool). Note: The back side of the foam pieces will not be visible in the finished drawer, so don’t worry if the fabric doesn’t completely cover them or if a seam looks crooked.
Reinforce exposed seams with white glue, using a brush to apply along seam lines. Let the wrapped foam pieces dry for four hours or until white glue has turned hard and transparent.

Above: To make a custom knife drawer, cut two additional pieces of foam to fit snugly on top of the base and wrap them with fabric. Make a foam sandwich by gluing the edges of the knife holder foam pieces on top of each other.
After the foam pieces dry, you can slide knifes between the two layers.

Above: Assemble silverware drawer inserts by fitting the foam pieces snugly against each other inside your drawer.
Then: wonder to yourself how you are going to make dividers to keep your different types of silverware (R) from getting all jumbled and messy inside the drawer.
Close drawer and think about it overnight.
Above: OK, I am still thinking about it (two days later). Do you have any ideas about how to make the dividers? I don’t think the foam will work, because if I wrap it with fabric, the seams will show. (Won’t they?) I bought some thicker Styrofoam, but when I tried to cut it to size, it spewed little messy ragged bits of foam everywhere. Argh. Are there any DIY geniuses reading this? If so, please leave suggestions in the comment section below.
I think we can work this out together. And if not? Stop Me Before I DIY Again.


Have a Question or Comment About This Post?