At a dinner party, I was entranced when a friend unpacked her backpack to reveal each of her dinner contributions: a bottle of wine, half a loaf of fresh bread, and six Bosc pears, each group intricately bundled in specifically-knotted furoshiki cloth wraps. The wrapping was not only practical, preventing the wine bottle from smashing into the delicate pears on her walk over, but also elevated the whole experience and made the packages feel like gifts.
Furoshiki is a centuries-old tradition in Japan as a way to bundle and transport belongings and presents. It’s waste-free too–which explains why the Japanese Ministry of the Environment issued a pamphlet detailing the different techniques to use depending on what you want to wrap. Furoshiki can be applied to just about any object, large or small, and uses simple knots and folds, all of which are fairly easy to master. Here’s a look at four of our favorite techniques:
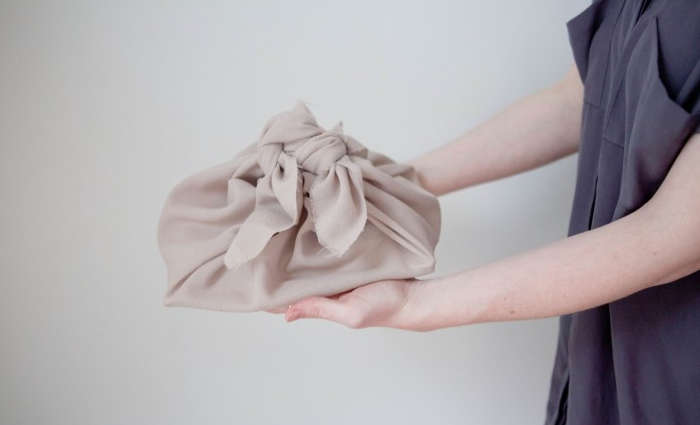
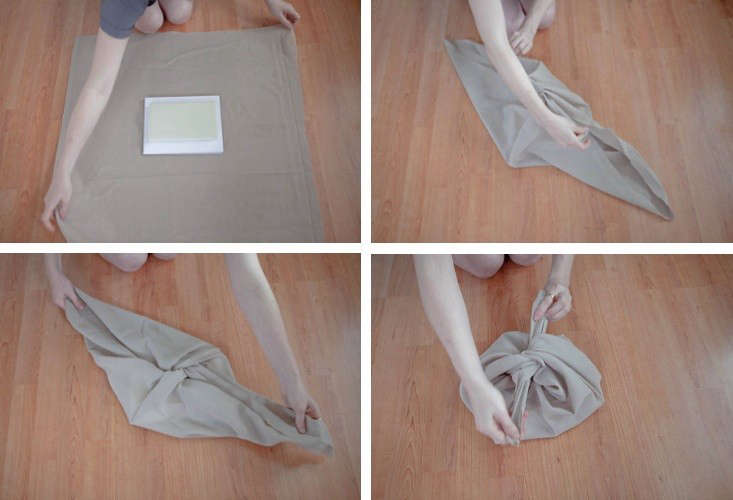
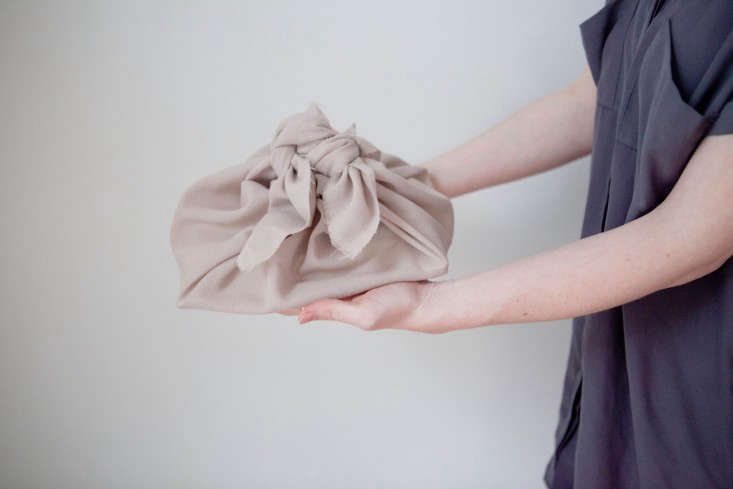
Above (clockwise from top left): Place your object in the center of the furoshiki (most are pre-cut square cloths sized anywhere from 18 to 45 inches; you can easily make your own—any knottable fabric works). Take two opposite corners of the square and tie them into a knot in the center; if the ends are long you can tuck them in. Then take the other two opposite corners and knot them just above the first knot. Above: The result is a simple and sturdy satchel.
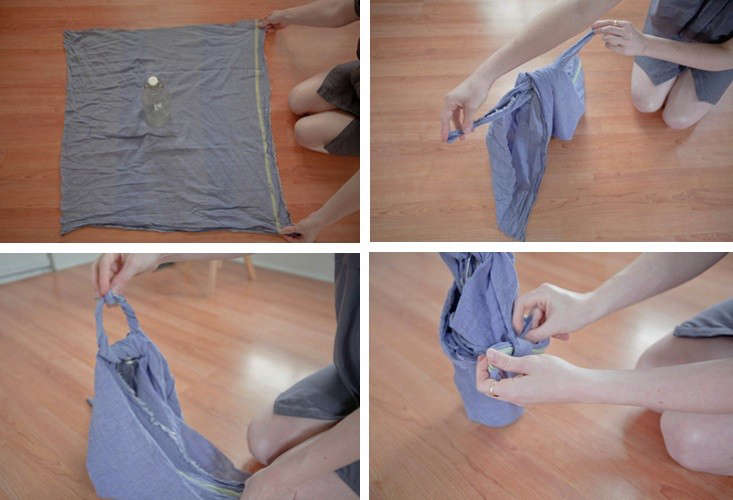
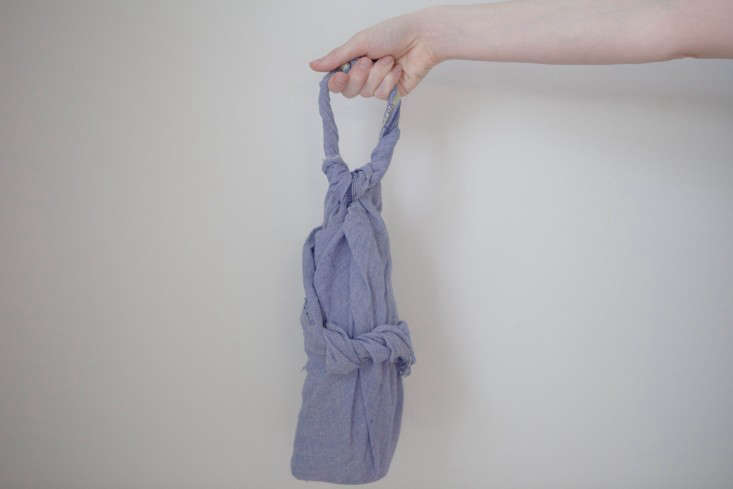
The Bottle Wrap
Above (clockwise from top left): Place a bottle in the center and, as with the basic wrap, take the two opposite corners of the cloth and bring them together above the bottle in a knot with long ends. Twist the ends as though you were wringing out a towel and tie the twists together in another knot above the first, creating a little loop over the bottle. Finally, take the other two opposite ends and knot them at the front of the bottle. Above: The bottle wrap is a reusable alternative to a wine bottle gift bag.
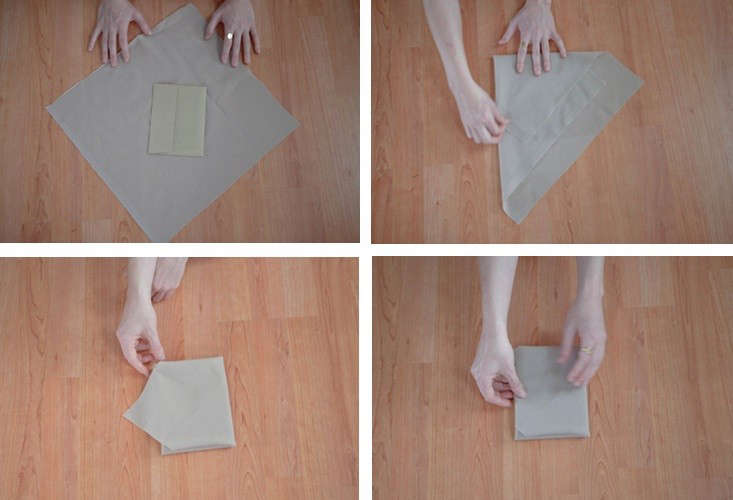
The Card Wrap
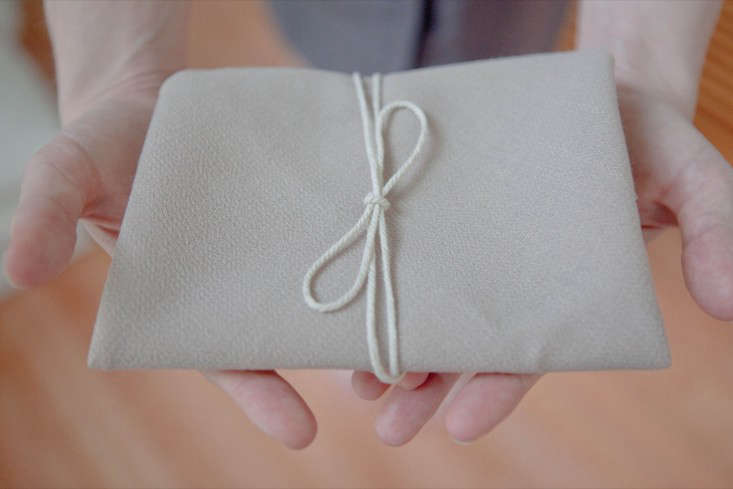
Above (clockwise from top left): Place a card at a diagonal in the center of the cloth. Fold two corners over the card to create a point (like the shape of a party hat) on one side of the card. Next, fold the sides in on a straight line as if you were forming an envelope. Fold the bottom end of the triangle over to create the bottom of the envelope, and finish by tucking in the point. Above: Tie up the package with string, and you have a nice protective cloth for your gift card.
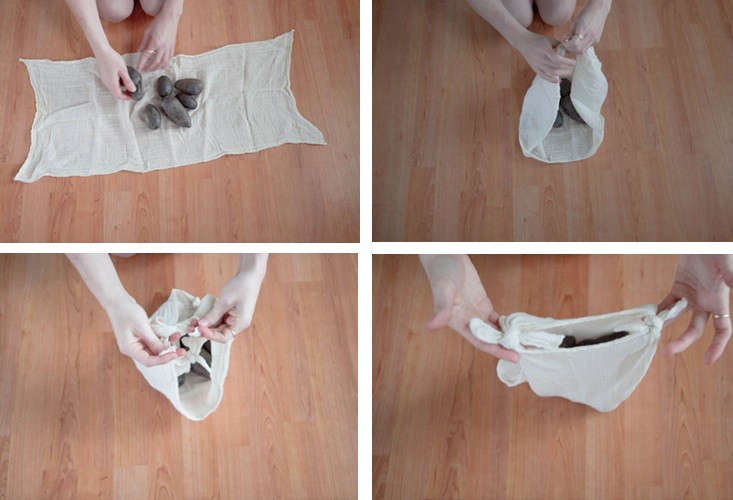
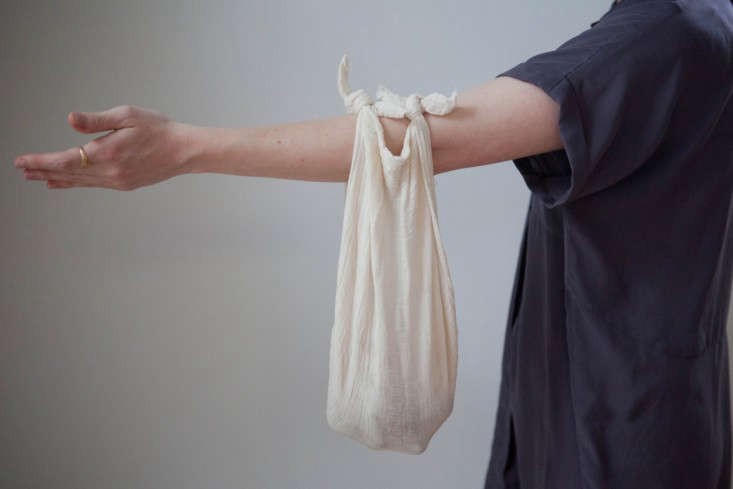
The Carry Wrap
Above (clockwise from top left): While the other three wrapping styles work nicely for a single object, the carry wrap is ideal for a group of things, such as these purple heirloom potatoes. Place the objects in the center of your cloth (since I’m wrapping produce, I opted for cheesecloth for breathability; the cloth is a rectangle but you can also use a square). Gather two corners of the fabric along the same end, rather than opposing sides, and knot them together. Repeat for the other side to create an open shopping bag-style pouch. Above: The result is a great option for an impromptu tote, such as to carry farmers’ market purchases. If you keep the cloth in your bag, you have it as needed.
When you register as a free Member of the Remodelista family of websites (Remodelista, Gardenista, and The Organized Home), you gain access to all current posts plus 10 archived posts per month, our internal bookmarking tool, and the community bulletin board.
Access 10 archived posts (older than one year) per month on each site
Use of our internal bookmark tool, so you can save products, posts, and other pages for quick reference
Access to our community bulletin board so you can ask and answer design-related questions
Unlimited access to the Product Catalogs, Design Travel sources, and Architect & Designer Directory listings
Choose from our ten newsletters to keep up with the latest on the sites
Or Subscribe for Maximum Value!
For $5/month ($59.99 paid annually) you'll enjoy unlimited, ad-free access to Remodelista, Gardenista, and The Organized Home and all the benefits of Membership.
Annual subscribers pay 50% off the monthly subscription price of $9.99
×
Subscribe to the Remodelista family of websites
For $5/month ($59.99 paid annually) you'll enjoy unlimited, ad-free access to Remodelista, Gardenista, and The Organized Home and all the benefits of Membership.
Annual subscribers pay 50% off the monthly subscription price of $9.99
×
Sorry! As a registered member you get 10 free posts from our archive (posts more than a year old) every 30 days. You have reached your limit for this 30-day period. If you would like to access unlimited posts from the archive (ad free, too), become a subscriber today, and keep reading as many articles as you want.
Full Access Individual Subscription
Benefits include:
Unlimited access to Remodelista, Gardenista, and The Organized Home sites
Ad-free browsing environment
Unrestricted access to 30,000+ archived posts
Receive the full-text daily newsletters
All features that Members have access to
Annual subscribers pay just 50% off the monthly subscription price of $9.99
Sorry! You have reached your limit of three (3) free posts from our archive every 30 days. You can increase this to 10 posts by joining as a free Member, or read unlimited posts with no ads by becoming a paid Subscriber.
Subscribe to the Remodelista family of websites
For $5/month ($59.99 paid annually) you'll enjoy unlimited, ad-free access to Remodelista, Gardenista, and The Organized Home and all the benefits of Membership.
Annual subscribers pay 50% off the monthly subscription price of $9.99
Become a Member at no charge
When you register as a free Member of the Remodelista family of websites (Remodelista, Gardenista, and The Organized Home), you gain access to all current posts plus 10 archived posts per month, our internal bookmarking tool, and the community bulletin board.


Have a Question or Comment About This Post?
Start the Conversation